一、简介
想要使用web3j开发ETH钱包,我们需要把准备工作做好,那么先让我们来了解下什么是web3j:https://web3j.readthedocs.io/en/latest/,我这里是最新版本的地址,随着时间的变化,我们需要使用心得版本来编写我们的程序。 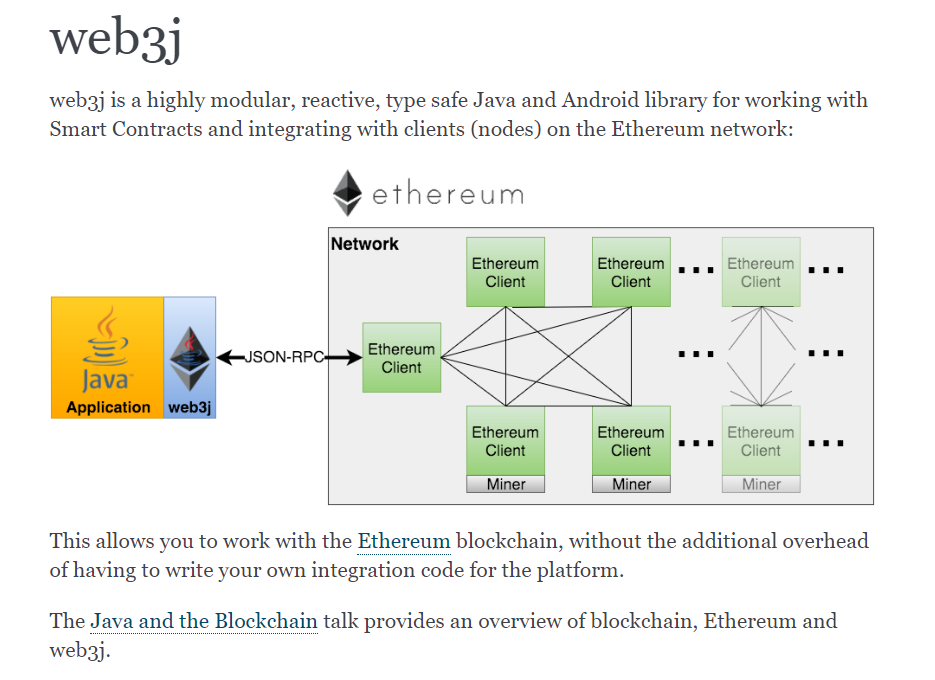
web3j是一个高度模块化,反应灵敏,类型安全的Java和Android库,用于处理智能合约并与以太坊网络上的客户端(节点)集成:这使您可以使用以太坊区块链,而无需为平台编写自己的集成代码的额外开销。 Java和Blockchain对话提供了区块链,以太坊和web3j的概述。
二、准备工作
想要使用web3j,我们只需使用项目构建工具引入就可
Maven
Java 8:
1 | <dependency> |
Android: 1
2
3
4
5<dependency>
<groupId>org.web3j</groupId>
<artifactId>core</artifactId>
<version>3.3.1-android</version>
</dependency>
Gradle
Java 8: 1
compile ('org.web3j:core:3.6.0')
Android: 1
compile ('org.web3j:core:3.3.1-android')
然后开启自己的节点,上一篇是说使用自己的geth客户端开启,但是我们现在使用infura,来创建自己的项目
注册成功后创建自己的项目: 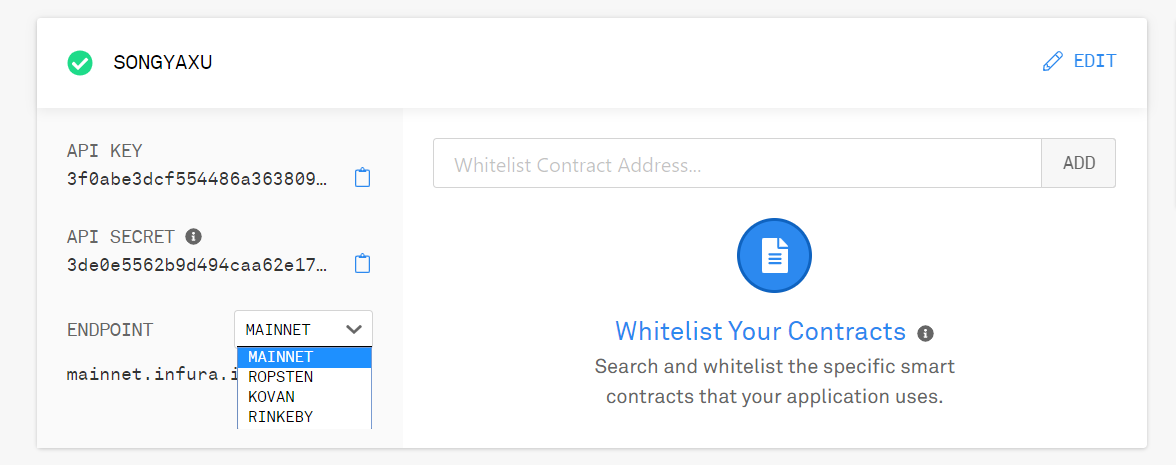 可以看到 我们可以使用不同环境的不同节点。
三、账户创建和充值及部分代码。
我们现在已经把几乎所有的工作都昨做完了,但是还有一个就是我们钱包的eth的获取,我们可以通过挖矿获取,但是这个是测试环境我们还可以通过其他方式获取(在真实环境我们可以通过交易所来购买)。
现在我们先写下我们创建账户和入门web3j的代码:
1 | /* We start by creating a new web3j instance to connect to remote nodes on the network. |
创建钱包地址:
方法1
这个方法这是和自己的节点,自己创建账户后,对应的钱包文件会存在../keystore/ 的目录下 1
2
3
4
5
6
7
8try {
NewAccountIdentifier newAccountIdentifier = admin.personalNewAccount(password).send();
log.info("创建ETH账户成功,账户id = {}",newAccountIdentifier.getAccountId());
return newAccountIdentifier.getAccountId();
} catch (IOException e) {
log.error("创建ETH账户失败,错误信息:{}",e);
return null;
}
方法2
这个方式需要自己制定生产钱包文件的目录 1
2
3
4
5String walletFileName="";
String password = "123456qwerty";
String walletFilePath="C:\\Users\\yaxuSong\\wallet";
walletFileName = WalletUtils.generateNewWalletFile(password, new File(walletFilePath));
log.info("walletName: "+walletFileName);
通过这样的方式 ,我们就可以创建自己的钱包地址,在测试环境中我们使用https://www.rinkeby.io/#faucet给自己充值测试币
首先我们需要使用Twitter、Facebook、Google Plus发布新的公开内容,内容是自己的钱包地址,然后粘贴相应的文章的地址到faucet.
我这里使用的是Google Plus.
1.发布带自己钱包地址的公开文章
发布成功之后点击分析图表进入的界面如下,就是自己的文章(post)的地址:https://plus.google.com/103762921276095780168/posts/fhTRmP6gXDb 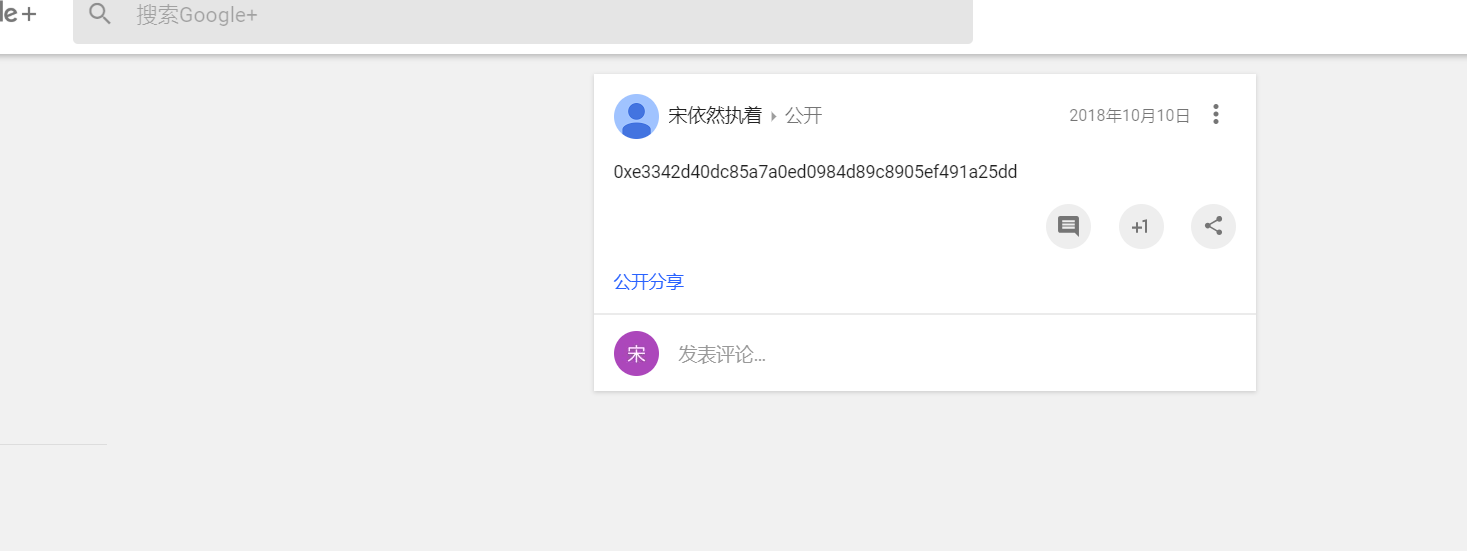
2.粘贴地址
然后进入faucet粘贴地址进行充值。 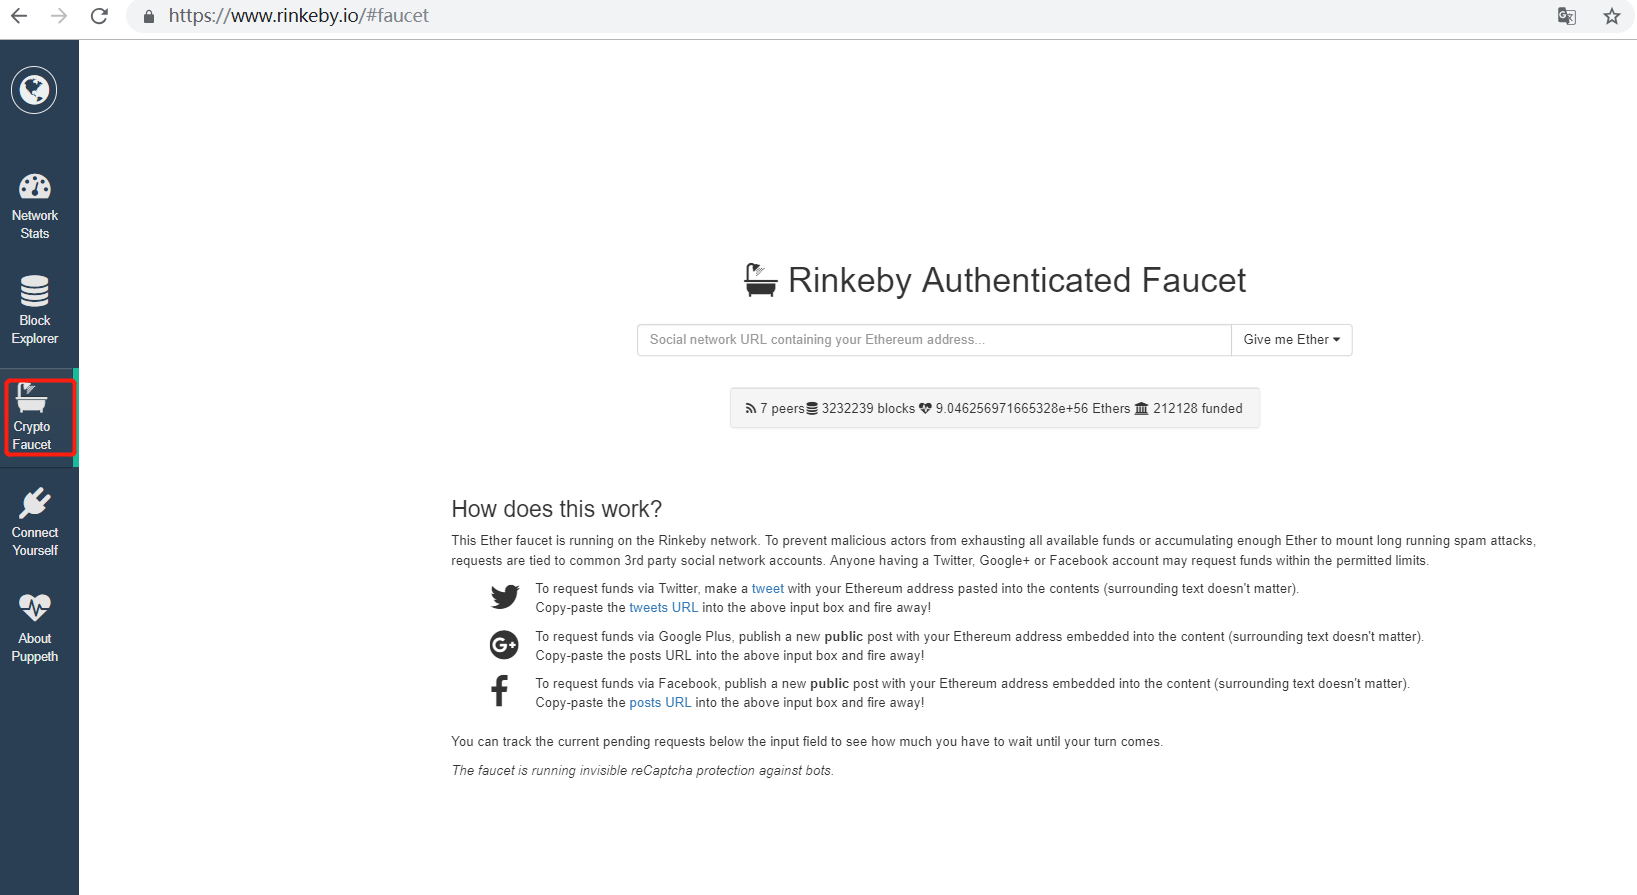
粘贴文章地址,并选择充值数量 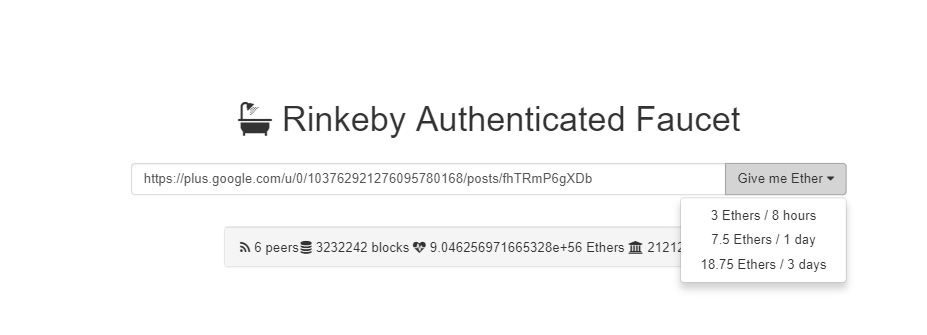 点击充值,显示接受转账
 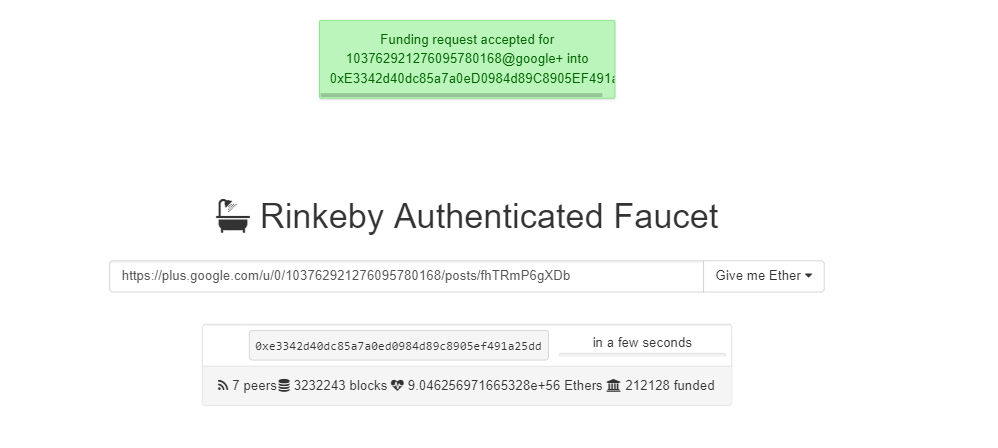 显示已经转账成功
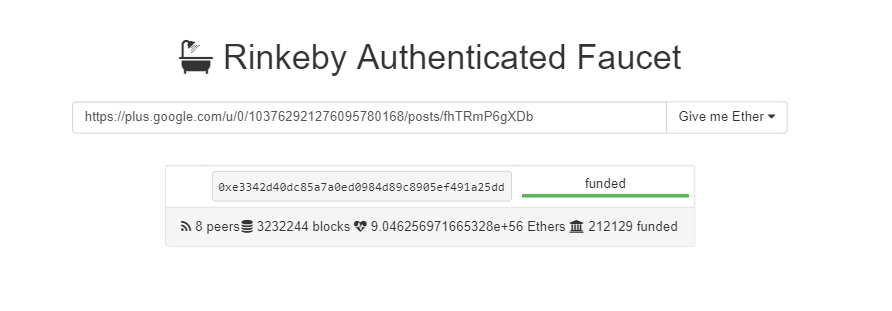
这里需要注意,有时候测试会有一些卡,可能有很多转账都有发放,所以请等待没有排队对列时进行,不然也不会到账。 ##### 3.查看是否到账和账户状态 我们可以通过我们的地址去 explorer:https://www.rinkeby.io/#explorer
如图: 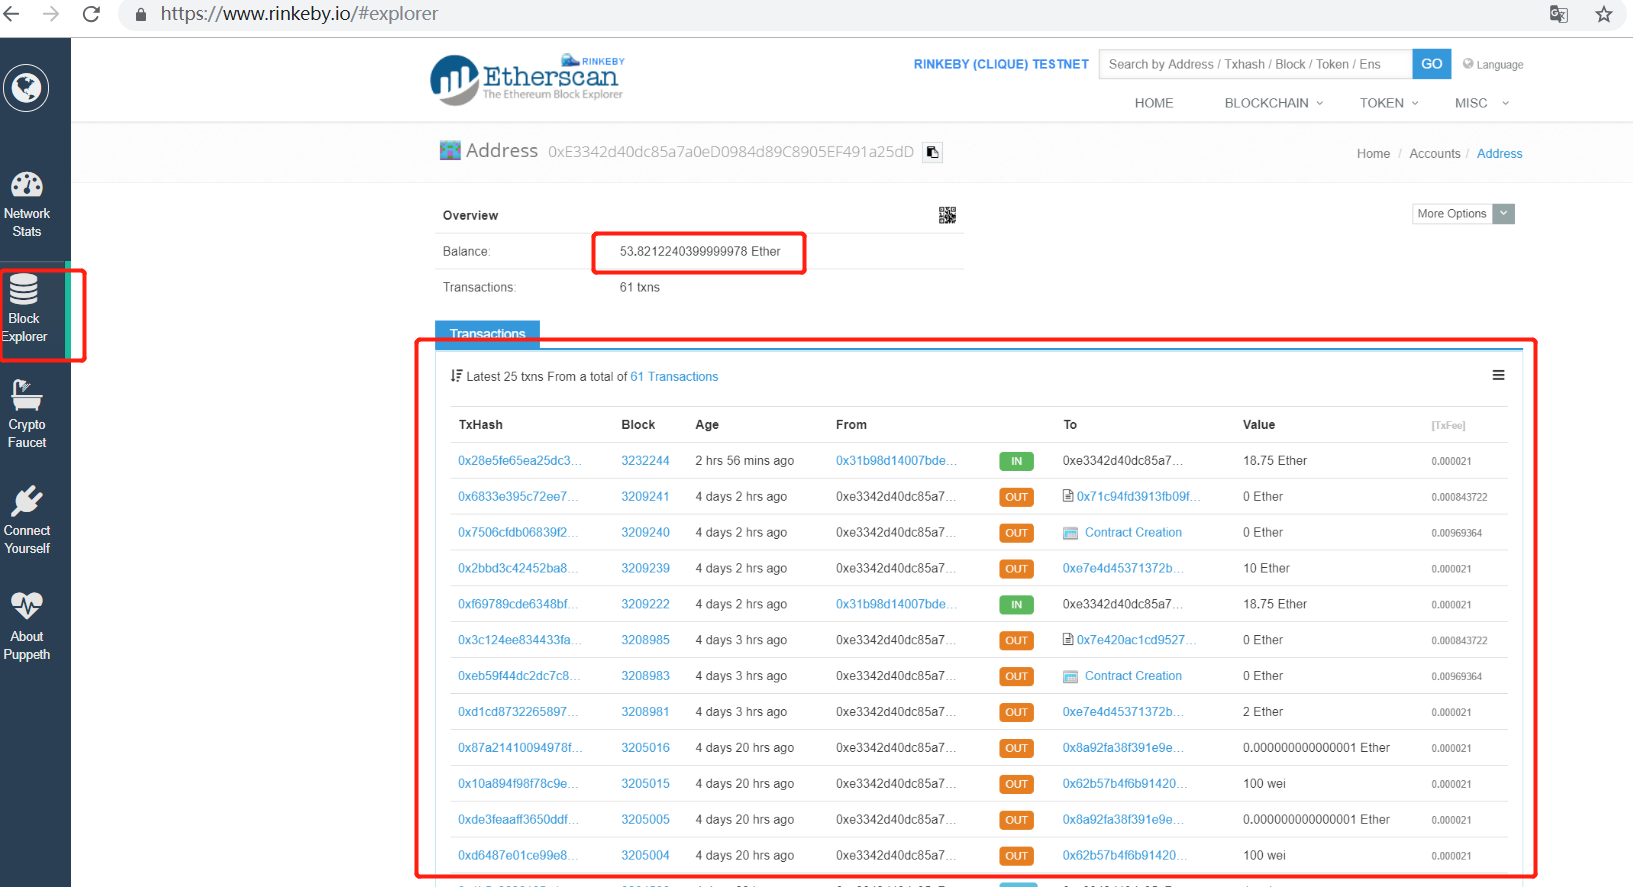
这样我们就有可以操作的ETH进行转账等操作了。
四、参考代码、DEMO
sample :https://github.com/web3j/sample-project-gradle 因为项目是用Gradle构建的,我这边在下载依赖时出现很多问题,后来改了下仓库,具体修改如下:
build.gradle
1 | group 'org.web3j' |